We believe in eating well. We also believe in eating on a budget. We’ve tried our best to combine these two philosophies on our world bicycle tour.
People ask us all the time what we eat while on the road, and to be honest, it’s a hard question to answer because it can vary a lot depending on where we are in the world. In Central and South America and Asia, we almost exclusively ate out for lunch every day. It was affordable, easy and tasted good. In Europe and the US, we typically carry everything we need to make sandwiches along the way—peanut butter & jelly, cans of tuna, or even fresh deli meat and cheese if climate allows.
But one thing has been consistent through the bulk of our trip: we cook our own dinner. Like most touring cyclists, we carry our own kitchen, and we decided before the trip it was worth it to us to carry some luxury items on this front. So we have two pots (one large, one medium, and their lids double as skillets), a cutting board, two kitchen knives, and various smaller utensils. We usually carry some olive oil for sautéing vegetables, as well as a few additional spices (though we use salt the most). We have an MSR Dragonfly stove. Since we’ve been back in the USA, we’ve made a point to have variety in our diet. Many cyclists on long trips basically survive on pasta and/or rice. And we’ve eaten our fair share of these, make no mistake! But since we’ve been back in the homeland, we feel like we’ve concocted some pretty tasty meals, and we thought we’d share the recipes with you. Now… if you’re cycling in other countries, you might not find this very helpful. But if you’re traveling in the US (and even car camping!), many of these might be useful to you.
Please note the following particulars about these recipes. We try to eat “real food” as much as possible. We are not 100 percent. It’s difficult at times, especially when riding through remote areas. Also, most of these meals already are or could be made gluten-free, and many can be dairy-free as well. We survived six months of cycling on a gluten and dairy-free diet, and thus understand the demands of traveling with special dietary needs. (Wondering why? Read more about the details here and here.) Also, almost all of these recipes make a lot of food. It can serve two REALLY hungry cyclists, or just three pretty normal people.
*naturally gluten and dairy free
**can be modified to make it gluten and/or dairy free
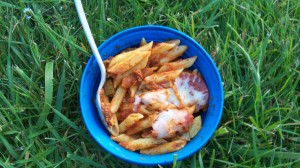
Pepperoni Casserole**
1 box penne pasta
1 zucchini squash (or courgette, as the English call it), chopped
1 jar marinara sauce
½ bag shredded mozzarella cheese
1 small packet of sliced pepperonis (found in the pre-packaged deli meat area)
Preparation:
Cook the pasta according to instructions on package. When it’s about halfway done, add the zucchini to the boiling water, allowing it to cook fully. Strain the pasta when it’s done. (Do not turn off your stove yet!)
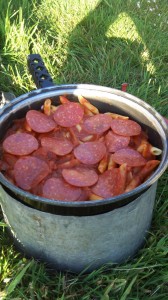
Separate the pasta into two pots. In the larger pot, mix half the marinara sauce with the pasta and zucchini. Smooth it on top, then cover with a layer of pepperonis. Then add a layer of the mozzarella cheese (be as generous as you like!).
Repeat the process with the second pot of pasta, adding the sauce while it is in the second pot, but repeating the following steps after layering it on top in the larger pot.
Cook the entire pasta mixture on low heat for approximately 10 minutes, or until cheese is melted.
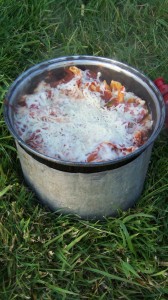
Final layer of cheese is on, and this is after about 5 minutes of low to medium heat, allowing everything to cook together.
Field Notes: It’s easy to make this one gluten-free—simply use gluten free pasta. But I’m afraid if you take the cheese out, you’ll really lose something. So if you’re dairy free, I’d skip this one! Same general rules apply with carrying pepperoni as the sausage (see above). Also, please note that this one is quite a chore to clean up. I would not recommend it for wild camping—it’s really nice to have a sink to scrub it out, especially as some of the pasta is bound to stick to the bottom of the larger pot. Also, please note that this one makes a TON! It’s a huge pot of dense food… so it’s great for sharing, or for when you’ve been riding hard in the mountains!
Black Bean Burritos**
1 can of black beans
1 can golden sweet corn
1 tomato, diced
1 package shredded lettuce
1 package flour or corn burrito shells (corn if you’re gluten-free)
1 package shredded Mexican cheese blend
1 small tub sour cream
optional: ½ cup of rice (only if you’re really hungry)
Preparation:
Without straining, add your beans to one pot and your corn to the other. Each one should be simmered for a few minutes.
Meanwhile, dice your tomato.
When everything’s ready, construct your burrito as desired.
Field notes: I would only use the sour cream if you do the grocery shopping toward the end of the day. It shouldn’t go unrefrigerated for a long period of time. If you do add the rice, just cook it first and simply add the can of corn (strained) when it’s almost done. You’ll have the rice and corn together, but it’s really the only way to make it work with just two pots!
This is another one that doesn’t work as well dairy-free. Without the sour cream, the burritos can be a little dry, which isn’t a huge deal. But without the cheese, I’m afraid they just don’t taste as good.
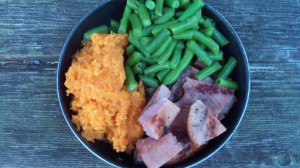
Thanksgiving Dinner * (no, we have never actually done this on Thanksgiving)
2-3 sweet potatoes
1 can of green beans, or 1 package frozen green beans (depends on climate and how long you carry them)
1 ham steak (see field notes for details)
Preparation:
Peel sweet potatoes and chop into bite-sized pieces
Add to a pot of boiling water. Allow them to boil until they are very soft. Strain the water.
Mash the sweet potatoes with a fork.
(While mashing the sweet potatoes, start warming a small amount of water for the beans. Whether they are frozen or canned, they don’t need to be cooked, only heated up.)
If you carry butter or oil, add a little to the sweet potatoes while mashing. I also add a bit of honey (to taste) if I have it.
Once the beans are ready, set them aside. Use the lid from one of the two pots to pan fry the ham steak. If the lid is small, just cut the ham steak into smaller pieces. It only needs to be cooked a couple of minutes on each side.
Serve together and enjoy!
Field notes: For starters, you might be wondering what a ham steak is! It is basically a large, thickly sliced piece of sliced ham. You can usually find it in the meat department, or maybe with pre-packaged sandwich meat. I had never heard of these until Dave introduced me to them. They are really good! It comes pre-cooked and in a sealed package, so same rules apply as with the sausage or pepperoni—don’t carry this in extreme heat. Also, ham steak is really tasty on the grill! So this is a great meal if you’re staying at a campground and can build a fire. You don’t have to cook it—only sear it—so it doesn’t take more than 5-7 minutes to have it ready.
As a side note, we carry metal forks, which work well for the task of actually mashing the sweet potatoes. Not sure if a plastic one would do the trick.
Pasta with Veggie Sauce**
2 zucchini squash (courgette), diced
1 eggplant, diced
1 clove fresh garlic, chopped
1 jar marinara sauce
1 pack of pasta (variety of choice)
Preparation:
Saute eggplant (use some olive oil if you have it!)
Add diced zucchini and garlic, continue to sauté until vegetables cook down
Add marinara sauce, allow to simmer on low heat for 5 minutes
Cook pasta according to direction on packet
While straining the pasta, put the sauce back on the stove to reheat for a few minutes
Serve and enjoy!
Field Notes: I use gluten-free pasta whenever I can find it—which is usually only at bigger chain grocery stores. I find the penne or rotini to work the best. All the gluten-free spaghetti I’ve made makes a weird film in the water and we end up using loads of extra water to strain it well. The other types seem to cook more like “normal” pasta should.
Also, to mix things up, or if I can’t find eggplant, I just throw in a can of chickpeas (drained) instead–equally filling and tasty.
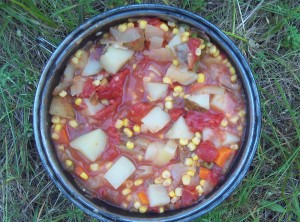
Vegetable Stew*
2 large potatoes, diced
1 carrot, chopped
1 onion, chopped
1 stalk of celery, chopped
1-2 cans of stewed tomatoes
1 can of corn
Preparation:
Chop all vegetables and add to boiling water. When the potatoes and carrots are soft, add the can(s) of tomatoes and the corn. Allow to simmer to 5-10 minutes.
Enjoy on a cold, rainy night on the road!
Field notes: This recipe is very easy. We’ve found the single stalk of celery to be a critical ingredient—we love the flavor it adds! If we can’t find that, we don’t cook this meal. This meal is almost as natural as it gets—all veggies—and is also super filling! Add the extra can of tomatoes if you’re really hungry, or if you enjoy a more “tomato-ey” stew.
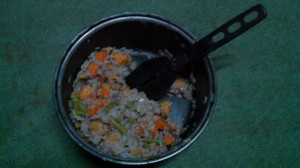
The Rice Meal*
4-5 different types of vegetables—whatever you want, really!
1 clove of garlic, chopped
1 cup rice (more or less depending on hunger)
Preparation:
Depending on the vegetables, chop them and begin sautéing in a little oil (if you have it). For example, if I have pepper, onion, potato, or carrot, I usually sauté those first.
Add the dry rice in with the vegetables, and continue to sauté for a minute.
Add the appropriate amount of water (based on rice packaging). Depending on the types of veggies and if they have a tendency to soak up some water, you might need to continue to adding it throughout the cooking process.
Add other vegetables when the rice has about ten minutes to go. For example, if I have broccoli, tomato, cabbage, fresh green beans or vegetables in a can (like corn), I would add them at this point.
Allow the rice to finish cooking. Salt generously.
Enjoy!
Field notes: We ate this meal almost every day in Asia because you can ALWAYS find rice and vegetables. It’s just a matter of what veggies you like, and how you like to mix your flavors. We like cooking it like this because the rice seems to absorb the flavor of all the things cooking together in the pot. Plus, it’s faster than cooking up vegetables, then cooking rice separately.
Taco Soup**
2 cans diced tomatoes
1 can corn
1 can black beans
1 can dark red kidney beans
1 packet taco seasoning
1 package Mexican blend shredded cheese
1 bag corn chips
Preparation:
Combine canned goods (strain only the corn) and the packet of taco seasoning. Bring to a boil in the pot and allow to simmer for 5-10 minutes.
Add cheese and scoop with corn chips as desired.
Field notes: Talk about easy—this meal is a breeze! And it’s fast. And… bonus here: it’s waterless. So if you’re headed out on a desolate stretch, consider this for dinner, as the only water you’ll need will be for clean-up. The only downside is packing space and weight. All those cans can really add up. So be sure to take that into consideration.
Also, beans can be whatever variety. You can easily substitute either of these options for chick peas or red beans or whatever your preference may be.
For dairy-free, just leave the cheese out. It’s already naturally gluten-free.
I will continue to add recipes to this post as we create them. I will also keep adding pictures (we just haven’t had a chance to cook all these meals since we started thinking to take pictures of them!) Some of these meals might seem a bit extravagant for cycle touring. Maybe it’s too many ingredients, or maybe you think the stuff we use is too heavy to carry. Everyone does it differently! We’ve decided the weight and the extra work in the evenings is worth it to us. Food is the fuel for our travel, so it might as well be good! Also, most of these meals can be made for $10 or less if you shop carefully—and you get a significant quantity of food for two people. We could possibly eat out at a fast food place for a comparable price, but the food quality wouldn’t be as good, and quite frankly, we might not get as MUCH as we want. And a few—like the veggie stew or the rice meal—can be done for less than $5. Not bad!
Also, we welcome input and recommendations from our readers. Have a favorite camping or cycle touring recipe? Send us an email at garthsontour@gmail.com, and we’ll try to get it up on the site. We also recommend checking out the Travelling Two recipe page for some additional ideas. People are constantly looking for new meals to cook on the road, and we want to help in spreading those ideas around!

1 comment
Garth says:
Aug 15, 2013
Yum!